首先介绍如何使用Hexo+Github来搭建一个属于自己的个人博客,无需额外服务器,无需编写代码手动开发。接着讲解如何使用Next来美化自己的博客。
一、前期预安装
1、Node.js和Npm安装
node -v输出v16.16.0npm -v输出8.16.0
2、Git的安装
git -v输出git version 2.37.1.windows.1Github账号的注册->SSH免密连接:
ssh-keygen -t rsa -C github注册时的邮箱地址以生成ssh密钥。复制C盘中用户目录\.ssh\id_rsa.pub文件内容到github主页->个人设置 -> SSH and GPG keys -> New SSH key
测试是否可以免密连接
ssh -T git@github.com
3、Hexo的安装
安装命令:
npm install hexo-cli -ghexo -v输出hexo-cli: 4.3.0等信息
二、在本地部署Hexo
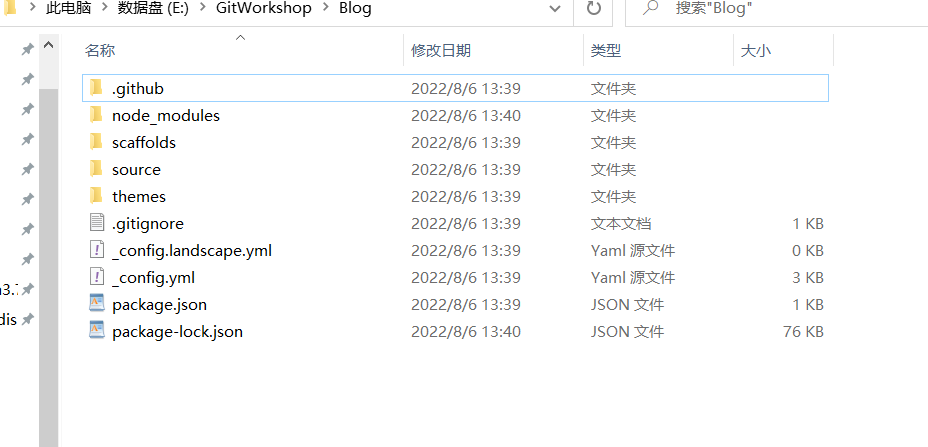
1、hexo init
创建一个Blog的本地文件夹(e.g.Blog),用于存放本地的bolg文件,等待后续deploy到github上
创建好后,进入该文件夹,右键选择Git bash here
将github上的hexo初始项目克隆到本地:
Hexo init成功运行之后即可在本地看到克隆下来的Hexo项目,包含了一些最原始的配置。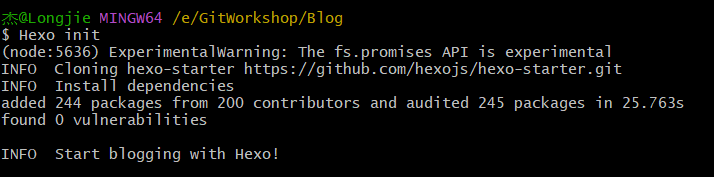
2、hexo s
hexo s -p 4000:-p指定端口号,默认为4000(可选);s==server;–config指定Hexo主配置文件

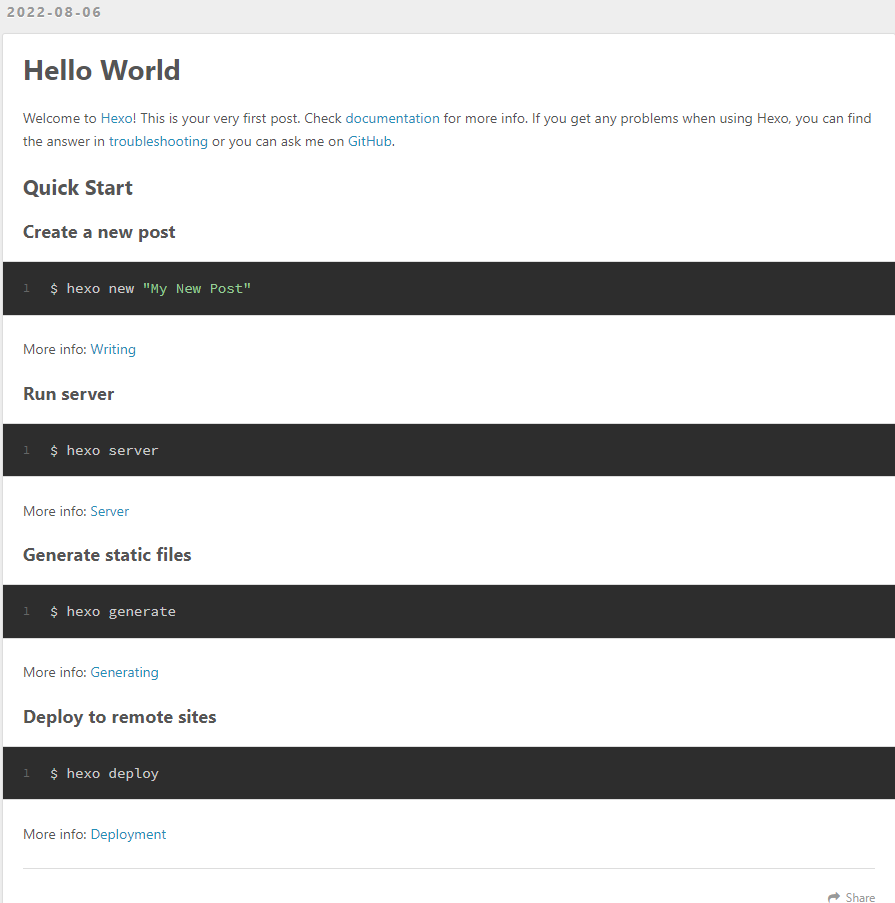
3、http://localhost:4000/
- 在本地浏览器地址栏中输入 http://localhost:4000/ 即可访问到默认的博客主页
三、Hexo界面主题–Next
1、设定主题
Next官方文档:http://theme-next.iissnan.com/getting-started.html
图标网址:https://fontawesome.com/icons
阿里巴巴矢量图标库:iconfont-阿里巴巴矢量图标库
在github上下载相关主题到themes目录下:git clone 主题http链接 themes/主题名
git clone https://github.com/theme-next/hexo-theme-next.git themes/next在hexo的_config.yml文件中修改
theme: 主题名修改完成之后使用如下命令:
hexo g重新生成html文件如果出现一些莫名其妙的问题,可以先执行
hexo clean来清理一下public中的html内容,然后再执行hexo g
2、修改主题
修改主题配置文件/themes/next/_config.yml
npm list查看使用npm安装的有关hexo的包
设置文章模板
scaffolds/post.md中可以定义新生成的md文章的模板,如下:
1
2
3
4
5
6
7
8
9
10
11
12
13
14
---
title: {{ title }}
date: {{ date }}
mathjax: true
categories:
- 随笔
tags:
- 生活
comment:
---
这里显示摘要!!!
<!--more-->
添加新的页面
hexo new page tags在生成的source/tags/index.md文件中添加如下内容:一定要指定type: tags,title为该页面所显示的标题,date为默认生成的。
1
2
3
title: 标签
type: tags
date: 2022-09-03 13:34:26在Next主题配置文件_config.yml中添加tags页面的相关配置:
1
2
3
menu:
home: / || fa fa-home
tags: /tags/ || fa fa-tags随后按照同样的方法,生成其余页面:categories、about
添加新的文章
hexo new "Hexo从0到1"接着在source/_posts文件夹中生成的对应md文件中编辑文章内容
搜索功能
安装相关插件:
npm install hexo-generator-search --save修改Next主题配置文件_config.yml的local_search的enable为true
1
2
3
4
5
6
7
8
9
10
11
local_search:
enable: true
# If auto, trigger search by changing input.
# If manual, trigger search by pressing enter key or search button.
trigger: auto
# Show top n results per article, show all results by setting to -1
top_n_per_article: 3
# Unescape html strings to the readable one.
unescape: false
# Preload the search data when the page loads.
preload: false在 Hexo 配置文件_config.yml 中添加:
1
2
3
4
# 搜索栏
search:
path: search.xml
field: post
图片的显示
笔者使用Typora来编写markdown文件,在markdown语法中插入图片使用:
1

但上述方式使用Hexo渲染之后无法正常显示,hexo官方指定的显示图片语法为:
1
{% asset_img a.png [图片] %}
这种方法在markdown中却不适用,两者冲突。解决方法有以下两种:
安装插件实现用markdown语法显示图片
1
2
3
4
5
6
7
8
9
10
11
参考: https://cloud.tencent.com/developer/article/1702112
1、Hexo的配置
首先配置hexo的_config.yml文件, 将 post_asset_folder 设置为true, 这样每次new 生成一个文章时都会同步生成一个同名的文件夹,然后设置相对或绝对路径。
接着安装插件 asset-image,设置图片为相对路径。npm install https://github.com/CodeFalling/hexo-asset-image
最后hexo clean && hexo generate && hexo s 运行查看
2、Typora中的配置
在文件->偏好设置->图像->插入图片时,选择为复制到指定路径,然后设置为./${filename}/;并对本地位置的图片应用上述规则。
注意:后续在markdown中插入图片时,修改图片路径中的 \ 为 / ,并且不带 .或者./ ,直接写目录/图片
此种方式如有文件夹中存在中文则会url转码,也会显示不正常,解决方法: new 文件时使用英文名,手动设置文章标题即可搭建阿里云图床+typora配置实现对象存储
1
参考:https://blog.csdn.net/dingyuzhi/article/details/136941675
to be continue…
四、将博客部署到Github上以公网访问
1、在Github上新建一个名为xingqitianbuxiayu.github.io的仓库
- xingqitianbuxiayu为唯一的账户名称,xingqitianbuxiayu.github.io唯一,不可换成其他名称
2、修改Hexo的_config.yml文件
1 | deploy: |
3、运行命令,生成html文件并部署到github上
npm install hexo-deployer-git --save需先安装,否则hexo d时会报错hexo clean来清理一下public的内容hexo g将本地的Hexo文件生成为html文件 g=generation –config指定配置文件(可选)hexo d将本地文件发布到github pages,d=deploy
4、可能遇到的问题
问题1:error: RPC failed; curl 28 OpenSSL SSL_read: Connection was aborted, errno 10053 send-pack: unexpected disconnect while reading sideband packet fatal: the remote end hung up unexpectedly
- 解决办法:https://blog.csdn.net/weixin_42881768/article/details/114888762
git config --global http.sslVerify "false":针对所有远程服务器全局执行,使git忽略ssl证书错误(把忽略证书错误的设置限定在特定的仓库)
问题2:git提示“warning: LF will be replaced by CRLF”的解决办法
- 解决办法:https://blog.csdn.net/u012757419/article/details/105614028
git config --global core.autocrlf true:让git提交时自动将windows的回车CR和换行LF转换成LF